
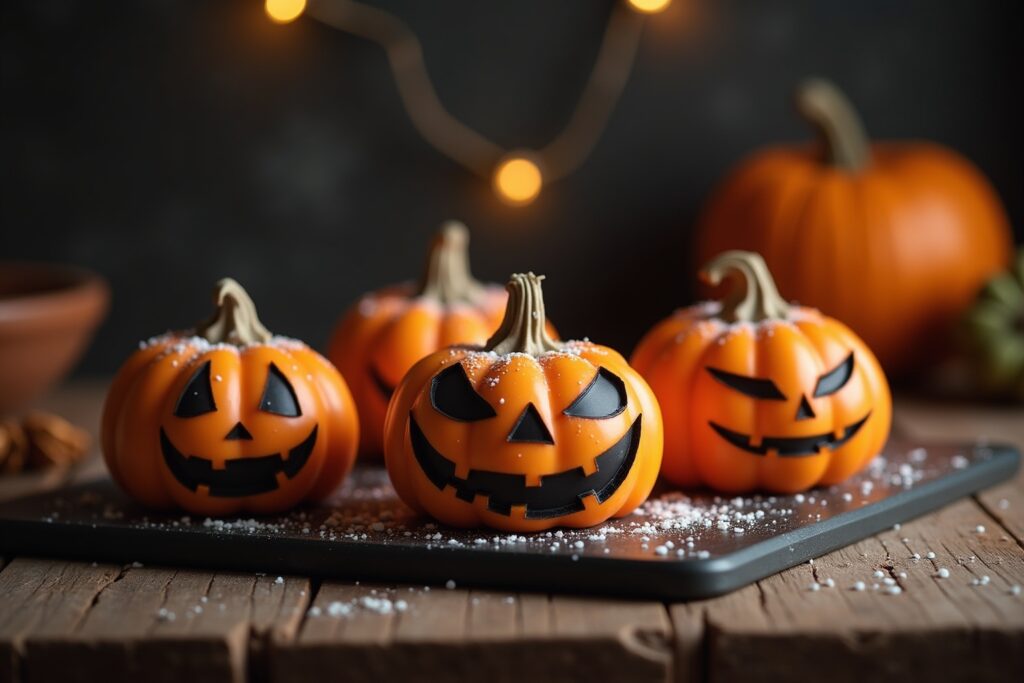
Elevate your Halloween celebration with frightfully delicious treats that are sure to impress your guests. Discover 13 essential Halloween baking recipes designed for both novice bakers and seasoned pros seeking spooky culinary inspiration.
These are the most popular Halloween Baking products
Keine Produkte gefunden.Mastering the Art of Halloween Baking: Key Considerations
Successful Halloween baking hinges on a few critical elements: creative decoration, thematic flavors, and recipes that are both impressive and manageable. You’ll want to consider recipes that lend themselves well to spooky transformations, offering opportunities for edible artistry. Think about textures and flavor profiles that align with the season, such as warm spices, rich chocolate, and vibrant, often contrasting, colors.
The Foundation: Essential Baking Techniques for Spooky Creations
Before diving into specific recipes, a solid understanding of fundamental baking techniques will serve you well. This includes proper creaming of butter and sugar for light and airy cakes and cookies, accurate measuring of dry and wet ingredients to ensure consistent results, and understanding leavening agents like baking soda and baking powder to achieve the desired rise. Mastering a reliable buttercream frosting is also paramount for decorating, as it’s versatile for piping, spreading, and creating various textures.
Ingredient Selection: Enhancing Flavor and Visual Appeal
The ingredients you choose directly impact both the taste and the visual spookiness of your Halloween bakes. For vibrant colors, consider natural food colorings like beet powder for red or spirulina for green, alongside traditional food dyes. For earthy or rich flavors, cocoa powder, pumpkin puree, and warming spices like cinnamon, nutmeg, and cloves are excellent choices. Don’t underestimate the power of extracts; a good quality vanilla extract or a hint of almond extract can significantly elevate your baked goods. For textural contrast, consider incorporating chopped nuts, crispy rice cereal, or even crumbled cookies into your recipes.
Your Ultimate Collection: 13 Must-Try Halloween Baking Recipes
Here is your curated selection of 13 Halloween baking recipes, ranging from classic favorites with a spooky twist to innovative treats that will captivate your guests.
- Spooky Spiderweb Brownies: Dense, fudgy brownies form the perfect canvas for intricate white chocolate spiderwebs.
- Ghostly Meringue Cookies: Light, airy, and delightfully crisp, these meringues are shaped and decorated to resemble friendly ghosts.
- Monster Eye Cake Pops: Bite-sized cake pops dipped in vibrant candy melts and adorned with edible candy eyes for a truly monstrous appearance.
- Pumpkin Patch Cupcakes: Moist pumpkin spice cupcakes topped with cream cheese frosting and decorated to look like miniature pumpkins.
- Graveyard Pudding Cups: Layers of chocolate pudding, crushed chocolate cookies (for dirt), and cookie tombstones create a delicious and eerie dessert.
- Mummy Pretzel Rods: Salty pretzel rods dipped in white chocolate and drizzled with more chocolate to resemble mummy bandages, complete with candy eyes.
- Witch Finger Cookies: Buttery shortbread cookies shaped into gnarled fingers, complete with almond “fingernails.”
- Bloody Red Velvet Cake: A classic red velvet cake with a vibrant crimson hue, often frosted with cream cheese and drizzled with a “bloody” raspberry or strawberry sauce.
- Bat-Shaped Sugar Cookies: Crisp sugar cookies cut into bat shapes and decorated with dark chocolate or black icing.
- Candy Corn Cookies: Flaky shortbread cookies marbled with the iconic colors of candy corn.
- Edible Eyeball Brownie Bites: Small, fudgy brownie bites topped with pre-made edible eyeballs for an instant creepy effect.
- Spiced Apple Cider Donuts: Warm, cinnamon-spiced donuts infused with apple cider, perfect for a cozy autumn treat.
- Jack-o’-Lantern Orange Cookies: Soft, chewy cookies flavored with orange zest and decorated to resemble mini Jack-o’-lanterns with royal icing.
Detailed Breakdown of Popular Halloween Baking Categories
To help you navigate the vast world of Halloween baking, here’s a breakdown of popular categories and what makes them perfect for the season.
| Recipe Category | Key Characteristics | Decoration Techniques | Flavor Profiles | Ease of Execution |
|---|---|---|---|---|
| Cookies & Biscuits | Versatile shapes, ideal for intricate decorating, portable. | Royal icing, fondant, edible markers, candy melts. | Sweet, spiced, buttery, chocolate. | Beginner to Intermediate. |
| Cakes & Cupcakes | Central showpieces, can be carved, layered, or filled. | Buttercream frosting, fondant, edible images, sculpted elements. | Rich, moist, spiced, chocolate, fruit-based. | Intermediate to Advanced. |
| No-Bake Treats | Quick preparation, often child-friendly, creative presentation. | Candy melts, sprinkles, edible eyes, crushed cookies. | Sweet, chocolatey, fruity, creamy. | Beginner. |
| Individual Desserts | Portion-controlled, easy to serve, visually impactful. | Toppings, drizzles, small decorative elements. | Varied, can be adapted to specific flavors. | Beginner to Intermediate. |
Tips for Achieving Perfectly Spooky Decorations
Decoration is where your Halloween bakes truly come alive. Here are some tips to help you create frightfully impressive designs.
Mastering the Art of Frosting
A good buttercream is your best friend. For smooth finishes on cakes and cupcakes, ensure your butter is at room temperature and beat it until light and fluffy. For piping, consider different tips – a star tip for rosettes, a round tip for lines, and a leaf tip for accents. Experiment with colors; black, orange, green, and purple are classic Halloween hues. Remember to let your base frosting set slightly before adding intricate details like spiderwebs or drips.
Leveraging Candy Melts and Chocolate
Candy melts are fantastic for dipping pretzel rods, cake pops, and cookies. They set quickly and offer vibrant colors. White candy melts can be colored with oil-based food coloring. For more complex designs like chocolate webs, temper your chocolate or use melting wafers. Drizzling melted chocolate over a base layer can create a rustic, eerie effect, perfect for mummy treats or bat wings.
Edible Embellishments: The Devil is in the Details
Don’t underestimate the power of small edible elements. Edible candy eyes are a staple for creating monstrous creatures. Sprinkles in Halloween themes (ghosts, bats, pumpkins) add instant festivity. Cookie cutters are essential for creating specific shapes like bats, ghosts, or pumpkins. For a gruesome touch, consider using edible blood gel or red piping gel for drips and splatters.
Creating Texture for a Realistic Effect
Texture adds another layer of realism to your spooky creations. Crushed cookies can mimic dirt for graveyard desserts. Shredded coconut can be tinted green for spooky moss or white for spider webs. Toasted nuts can add a crunchy contrast to soft cakes. Don’t be afraid to experiment with piping techniques to create bumpy, textured surfaces that resemble monster skin or cobwebs.
Advanced Techniques for the Dedicated Halloween Baker
If you’re looking to push your Halloween baking skills, consider these more advanced techniques.
Fondant Work for Intricate Designs
Fondant allows for incredibly smooth finishes and detailed sculpting. You can cover cakes entirely in fondant for a polished look or use it to create figures, fondant cut-outs, or intricate patterns. Tools like fondant smoothers, cutters, and modeling tools are essential for working with fondant. Remember to allow fondant to dry slightly before adding edible paint or details.
Airbrushing for Ethereal Effects
An airbrush can create stunning gradients and subtle shading on cakes and cookies. This is ideal for achieving realistic textures like aging parchment, decaying surfaces, or ethereal glows. You’ll need edible food coloring specifically designed for airbrushing and a compressor. Practice on a practice surface before applying to your baked goods.
Sculpting with Cake and Rice Krispies Treats
For truly show-stopping creations, consider sculpting. This involves carving cakes into desired shapes or using Rice Krispies treats, which are more pliable and easier to mold into three-dimensional forms. These sculpted elements can then be covered in fondant or buttercream to complete the design. Examples include sculpting a haunted house, a spooky monster, or a cauldron.
Troubleshooting Common Halloween Baking Challenges
Even experienced bakers encounter challenges. Here’s how to overcome some common Halloween baking hurdles.
Preventing Frosting Mishaps
Softening butter too much can lead to greasy frosting. Ensure your butter is at room temperature but not melted. Over-beating can incorporate too much air, leading to a fluffy but unstable frosting. If your frosting is too thin, chill it for a bit or gradually add more powdered sugar. If it’s too thick, a tablespoon of milk or cream can help thin it out. Color bleeding can occur if you use too much liquid coloring on a light base; use gel colors sparingly.
Achieving Crisp Cookies
For crisp cookies, ensure you’re not overmixing your dough once the flour is added, as this develops gluten and can make them tough. Baking at the correct temperature and for the right duration is crucial. Over-baking will lead to dry, hard cookies, while under-baking will result in soggy centers. Allow cookies to cool completely on a wire rack to prevent steaming and sogginess.
Dealing with Coloring and Design Fading
Some food colorings, especially natural ones, can fade over time, especially when exposed to light or heat. When decorating, work in a cool environment. For intricate designs that need to hold their shape, consider using royal icing, which dries very hard. If using fondant, ensure it’s properly stored and sealed to prevent drying out and cracking.
Frequently Asked Questions about 13 Halloween Baking Recipes
What are the easiest Halloween baking recipes for beginners?
For beginners, recipes like Mummy Pretzel Rods, Graveyard Pudding Cups, and simple Bat-Shaped Sugar Cookies decorated with basic icing are excellent starting points. They require minimal complex techniques and offer high visual impact with straightforward execution.
How can I make my Halloween treats look scarier?
You can enhance the scariness by using darker color palettes, incorporating “gory” elements like edible blood gel or gummy worms, creating uneven or jagged textures, and utilizing edible eyes or fangs. Simple details like drips and splatters can also significantly amp up the spookiness.
Are there any gluten-free or vegan Halloween baking recipe options available?
Yes, many of these recipes can be adapted. For gluten-free options, you can substitute all-purpose flour with a gluten-free blend in cakes, cookies, and brownies. For vegan recipes, replace eggs with flax eggs or mashed banana, dairy butter with vegan butter or oil, and dairy milk with plant-based milk. Ensure your chocolate and sprinkles are also vegan.
What is the best way to store Halloween baked goods?
Most decorated cookies and brownies can be stored in an airtight container at room temperature for several days. Cakes and cupcakes with buttercream frosting are best stored in an airtight container in the refrigerator, especially in warmer climates, but allow them to come to room temperature before serving for optimal texture and flavor.
Can I prepare some components of these recipes in advance?
Absolutely! Many components can be prepared ahead of time. Cookie dough can often be chilled or frozen. Cake layers can be baked a day or two in advance and stored wrapped. Buttercream frosting can be made and refrigerated. Even fondant decorations can often be made several days in advance and stored properly.
What are some creative flavor combinations for Halloween baking?
Consider flavor pairings that evoke autumn and Halloween. Pumpkin spice is a classic, but also explore chai spice, apple cinnamon, salted caramel, dark chocolate with raspberry, and even a hint of chili in chocolate for a spicy kick. Orange and cardamom is another delightful combination.
How can I ensure my decorated cookies don’t smudge?
To prevent smudging, ensure that each layer of icing or decoration is completely dry before adding the next. Use flood icing for a smooth base and allow it to set before adding details. If you’re layering colors, a thin layer of edible glaze or corn syrup can sometimes help seal the color and prevent bleeding, though this requires careful application.


