
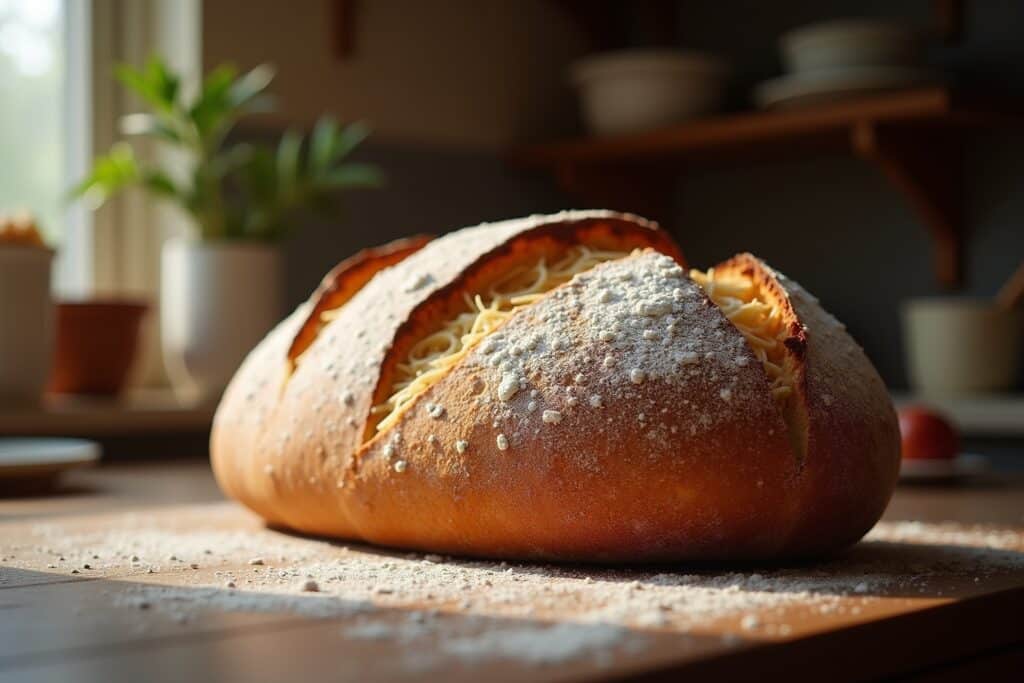
Unlock the secrets to creating stunning, flavorful artisan breads at home, transforming your kitchen into a professional bakery. This guide empowers you with the knowledge and techniques to achieve that perfect crust, airy crumb, and deeply satisfying taste that defines exceptional bread.
These are the most popular Artisan Bread products
Keine Produkte gefunden.The Essence of Artisan Bread: More Than Just Flour and Water
Artisan bread is a celebration of simple ingredients, time, and masterful technique. Unlike mass-produced loaves, it emphasizes quality over quantity, allowing the natural flavors of the flour, water, salt, and yeast to shine. The process is often a slow, deliberate dance, relying on fermentation to develop complex aromas and textures. When you bake artisan bread, you’re engaging in a time-honored tradition, connecting with the very roots of culinary creation. It’s about understanding the science behind the rise, the magic of the crust, and the pure joy of sharing something truly delicious you’ve made with your own hands.
Key Components of Superior Artisan Bread Recipes
Mastering artisan bread involves understanding several critical elements that contribute to its unique character and superior taste:
- Flour Selection: The type of flour you choose is paramount. High-protein bread flours (like T65 or strong bread flour) are essential for developing a strong gluten network, which provides structure and chewiness. Whole wheat, rye, spelt, and other ancient grains add depth of flavor, color, and nutritional complexity. Experimenting with different flour blends allows you to tailor the taste and texture of your loaves.
- Hydration Levels: This refers to the ratio of water to flour in your dough. Higher hydration doughs (typically 70% and above) are wetter and stickier, but they contribute to a more open crumb structure and a wonderfully crisp crust. Working with high-hydration doughs requires specific techniques, such as stretch-and-folds, to build strength.
- Levain and Sourdough Starters: While some artisan breads use commercial yeast, many iconic loaves rely on a sourdough starter, a naturally fermented culture of wild yeast and bacteria. This starter, often called a levain when used in a specific recipe, imparts a distinctive tangy flavor and contributes to the bread’s unique texture and keeping quality. Nurturing and maintaining a healthy starter is a rewarding part of the artisan baking journey.
- Long Fermentation: Patience is a virtue in artisan bread making. Long, slow fermentation periods, often spanning many hours or even overnight in the refrigerator (cold proofing), are crucial for developing complex flavors and improving the digestibility of the bread. This extended resting time allows enzymes to break down starches and proteins, creating a richer taste profile.
- Shaping Techniques: The way you shape your dough before its final proofing significantly impacts the final structure and appearance of the loaf. Techniques like creating tension in the dough for a round boule or a long batard are essential for achieving a good oven spring and a beautiful final form.
- Baking Environment: A hot oven and the creation of steam are vital for achieving that characteristic artisan crust. Steam helps the dough expand fully in the initial stages of baking, leading to a lighter crumb and a crispier, golden-brown exterior. Using a Dutch oven or a baking stone with a steam pan are common methods to replicate a professional bakery environment.
Essential Equipment for Your Artisan Bread Journey
While you can begin with minimal equipment, certain tools can greatly enhance your artisan bread baking experience and results:
- Digital Scale: Precision is key in baking, and a digital scale ensures accurate measurements of your ingredients, especially flour and water, which are crucial for consistent results.
- Bench Scraper: Invaluable for handling sticky dough, dividing portions, and cleaning your work surface.
- Dough Whisk or Sturdy Spoon: Helpful for initially mixing wet and dry ingredients in higher hydration doughs.
- Banneton (Proofing Basket): These woven baskets help support the dough during its final proof, imbuing it with beautiful rings and a well-defined shape.
- Dutch Oven or Baking Stone: As mentioned, these are critical for creating the optimal baking environment, trapping steam and ensuring a good crust. A heavy-bottomed Dutch oven is particularly popular for home bakers.
- Razor Blade or Lame: Used for scoring the dough before baking. This not only allows for controlled expansion but also creates decorative patterns.
- Oven Thermometer: Oven temperatures can vary significantly. An independent thermometer ensures your oven is at the correct temperature for optimal baking.
Understanding Your Sourdough Starter: The Heart of Many Artisan Breads
A sourdough starter is a living culture of wild yeast and beneficial bacteria that naturally occurs in flour and the environment. It’s the leavening agent for sourdough bread and provides its signature tangy flavor. Creating and maintaining a healthy starter is a rewarding process:
To create a starter: Combine equal parts flour (often a mix of all-purpose and whole wheat) and lukewarm water in a clean jar. Stir until well combined. Cover loosely and leave at room temperature for 24 hours. Discard half of the mixture and feed it with fresh flour and water daily for about 7-14 days, or until it consistently doubles in size within a few hours of feeding and has a pleasant, slightly sour aroma.
To maintain a starter: Once established, you can store your starter in the refrigerator and feed it once a week. When you’re ready to bake, take it out, let it come to room temperature, and feed it regularly until it’s active and bubbly again. A healthy, active starter is crucial for a successful sourdough loaf.
Basic Artisan Bread Recipes to Get You Started
Embarking on your artisan bread journey is made easier with foundational recipes that highlight core techniques. These recipes are designed to build your confidence and understanding:
No-Knead Crusty Bread
This recipe exemplifies the magic of time and minimal effort for maximum flavor. It relies on a long, slow fermentation to develop gluten and requires no traditional kneading. The high hydration and baking in a covered Dutch oven create an incredibly crisp crust and a wonderfully open crumb.
Ingredients:
- 3 cups all-purpose or bread flour
- 1 ½ teaspoons salt
- ¼ teaspoon active dry yeast
- 1 ½ cups lukewarm water
Instructions:
- In a large bowl, whisk together flour, salt, and yeast.
- Add water and stir with a wooden spoon or spatula until just combined. The dough will be shaggy and sticky.
- Cover the bowl tightly with plastic wrap and let it rest at room temperature for 12-18 hours (or up to 24 hours for a more pronounced flavor).
- After the long fermentation, the dough will be bubbly and have increased in volume. Lightly flour your work surface.
- Gently scrape the dough out of the bowl onto the floured surface. It will be very wet and sticky. Try to form it into a rough ball by gently folding the edges under itself. Avoid overworking it.
- Lightly flour a clean kitchen towel or parchment paper. Place the dough seam-side down onto the floured surface. Cover loosely with the towel or parchment.
- While the dough rests, preheat your oven to 450°F (230°C) with a 5-6 quart Dutch oven (with its lid) inside for at least 30 minutes.
- Carefully remove the hot Dutch oven from the oven. Gently transfer the dough into the hot Dutch oven, seam-side up.
- Cover the Dutch oven with its lid and bake for 30 minutes.
- Remove the lid and bake for another 15-20 minutes, or until the crust is a deep golden brown and the internal temperature reaches 200-210°F (93-99°C).
- Carefully remove the bread from the Dutch oven and let it cool completely on a wire rack before slicing.
Simple Sourdough Bread
This recipe introduces you to the world of sourdough. It requires an active, mature sourdough starter and emphasizes proper handling of the dough through folds and shaping.
Ingredients:
- 100 grams active sourdough starter
- 350 grams warm water (around 80-85°F or 27-29°C)
- 500 grams bread flour
- 10 grams fine sea salt
Instructions:
- In a large bowl, combine the active sourdough starter and warm water. Stir until the starter is mostly dissolved.
- Add the bread flour and mix with your hands or a spatula until a shaggy dough forms and no dry flour remains.
- Cover the bowl and let the dough rest for 30 minutes (autolyse).
- Add the salt to the dough and incorporate it by pinching and folding it into the dough.
- Perform a series of “stretch and folds” over the next 2-3 hours. Every 30 minutes, wet your hands slightly, grab one side of the dough, stretch it up, and fold it over the center. Rotate the bowl and repeat 3-4 times. This builds gluten structure.
- After the stretch and folds, let the dough rest in a warm place for 4-6 hours, or until it has increased in volume by about 50-75% and shows signs of fermentation (bubbles on the surface).
- Gently turn the dough out onto a lightly floured surface. Perform a “pre-shape” by gently forming the dough into a round shape, creating tension on the surface. Let it rest, uncovered, for 20-30 minutes.
- Now, perform the final shape. For a boule, gently cup your hands around the dough and rotate it to create a tight surface tension. For a batard, gently form it into an oval shape.
- Place the shaped dough into a floured banneton, seam-side up. Cover with a damp cloth or plastic wrap.
- Place the banneton in the refrigerator for 12-24 hours for a cold proof. This develops flavor and makes scoring easier.
- Preheat your oven to 475°F (245°C) with a Dutch oven inside for at least 30 minutes.
- Carefully remove the hot Dutch oven. Gently invert the dough onto a piece of parchment paper. Score the top of the dough with a sharp razor or lame.
- Carefully lift the parchment paper with the dough and place it into the hot Dutch oven. Cover and bake for 20 minutes.
- Remove the lid and bake for another 20-25 minutes, or until the crust is deep golden brown and the internal temperature reaches 205-210°F (96-99°C).
- Cool completely on a wire rack before slicing.
Advanced Techniques for the Dedicated Baker
Once you’ve mastered the basics, you can explore more advanced techniques to elevate your artisan bread creations:
- Tangzhong or Yudane: These are cooked flour and water pastes that, when added to bread dough, create exceptionally soft, fluffy, and moist bread with a longer shelf life.
- Inclusions: Incorporating ingredients like olives, nuts, seeds, herbs, or dried fruits into your dough adds flavor, texture, and visual appeal. Add these during the later stages of dough development.
- Lamination: A technique borrowed from pastry making, where butter is enclosed within the dough and repeatedly folded and rolled out. This is essential for enriched doughs like brioche or croissants, creating distinct layers.
- Hybrid Doughs: Combining different flour types in specific ratios to achieve a balance of flavor, texture, and structure. For example, a blend of bread flour with a percentage of whole rye or spelt can offer complex nutty notes.
- Pre-ferments: Using a small portion of the dough to ferment for an extended period (like a poolish or biga) before adding it to the main dough. This enhances flavor and improves dough extensibility.
Troubleshooting Common Artisan Bread Issues
Even experienced bakers encounter challenges. Here are some common issues and their solutions:
- Dense Crumb: This can be due to insufficient gluten development, under-proofing, over-proofing, or not enough steam during baking. Ensure you are performing adequate stretch and folds, allowing sufficient proofing time, and baking with steam.
- Pale Crust: The oven may not be hot enough, or there wasn’t enough steam. Ensure your oven is accurately calibrated and that you are creating adequate steam, especially in the first half of baking.
- Gummy Interior: This often indicates underbaking. Ensure your bread reaches the correct internal temperature (205-210°F or 96-99°C) and cools completely before slicing.
- Dough is Too Sticky: While some high-hydration doughs are meant to be sticky, if it’s unmanageable, it might be due to too much water or insufficient gluten development. Be patient and use wet hands or a bench scraper to help manage it.
- Starter Isn’t Active: Ensure your starter is fed regularly with fresh flour and water, kept at a consistent room temperature (or fed more frequently if it’s cold), and that you are using good quality flour.
A Comparison of Artisan Bread Styles
The world of artisan bread is vast, with diverse styles offering unique characteristics:
| Bread Style | Key Characteristics | Typical Flour Base | Fermentation Method |
|---|---|---|---|
| Country Loaf / Pain de Campagne | Rustic, chewy texture, complex flavor, thick crust | Bread flour, often with whole wheat or rye | Sourdough or commercial yeast with long fermentation |
| Baguette | Crisp crust, airy and open crumb, light texture | High-protein bread flour | Commercial yeast, often with a poolish or sponge |
| Ciabatta | Extremely open and airy crumb, chewy texture, thin, crisp crust | Bread flour, very high hydration | Sourdough or commercial yeast with long fermentation |
| Rye Bread | Dense, moist crumb, tangy and earthy flavor, dark crust | Rye flour (varying percentages), often with bread flour | Sourdough is essential for flavor and structure |
| Focaccia | Flat, slightly chewy bread, often infused with olive oil and toppings | Bread flour or all-purpose flour | Commercial yeast or sourdough with moderate fermentation |
These are the latest Artisan Bread products with the best ratings.
Keine Produkte gefunden.FAQ – Frequently Asked Questions about Artisan Bread Recipes: Backen mit Leidenschaft
What is the difference between artisan bread and regular bread?
Artisan bread is typically made with simpler ingredients, without additives or preservatives, and relies on longer fermentation times and skilled shaping techniques. This results in a more complex flavor, a chewier texture, and a superior crust compared to commercially produced bread, which often uses dough conditioners and is baked rapidly for mass production.
How do I store homemade artisan bread?
Artisan bread is best stored at room temperature, wrapped in a linen bread bag or a loosely tied plastic bag to allow some air circulation. Avoid refrigerating it, as this can dry out the crumb. For longer storage, slice the bread and freeze the slices in an airtight container or bag; they can then be toasted directly from frozen.
Why is my sourdough starter not doubling in size?
There are several reasons your sourdough starter might not be active. It could be too young, not fed frequently enough, kept in too cold an environment, or the flour and water quality might be poor. Ensure you are feeding it consistently with equal parts flour and water, at a consistent room temperature, and allow it at least 7-14 days to establish. If it’s mature, try feeding it a slightly warmer water.
What does ‘hydration’ mean in bread making?
Hydration refers to the ratio of water to flour in a dough, expressed as a percentage. For example, a dough with 70% hydration means that for every 100 grams of flour, you are using 70 grams of water. Higher hydration doughs are wetter and stickier but generally produce a more open crumb and a crispier crust.
Can I use all-purpose flour for artisan bread?
While you can use all-purpose flour for some artisan bread recipes, particularly those with lower hydration or when seeking a softer crumb, using a high-protein bread flour is generally recommended for most classic artisan loaves. Bread flour has a higher gluten content, which is essential for developing the strong structure needed for a chewy texture and an open crumb.
How do I achieve a good oven spring?
Oven spring is the rapid expansion of dough in the oven during the initial stages of baking. To achieve good oven spring, ensure your dough is properly proofed (not under- or over-proofed), that it has sufficient gluten development for structure, and crucially, that you are baking it in a very hot oven with adequate steam. Steam allows the crust to remain soft longer, enabling the dough to expand fully.
What is the purpose of scoring bread before baking?
Scoring bread with a sharp blade (a lame or razor) before baking serves two primary purposes. Firstly, it allows for controlled expansion of the dough during baking, preventing the crust from bursting in unintended places. Secondly, it creates decorative patterns, adding to the visual appeal of the final loaf.


