
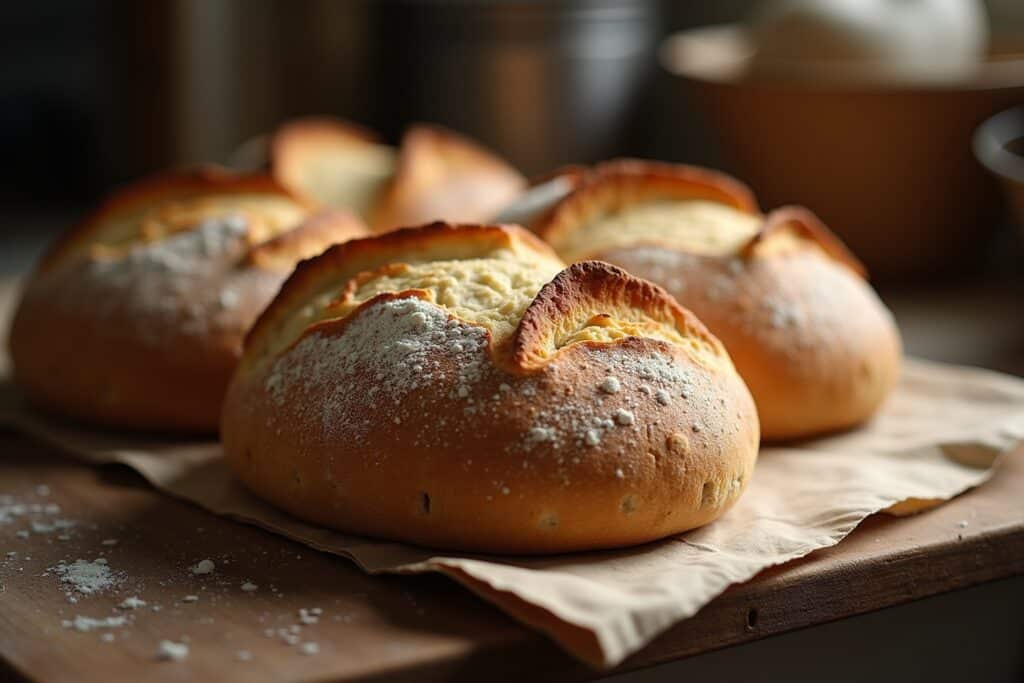
Unlocking the magic of homemade bread is more accessible than you might think; mastering simple bread recipes empowers you to create delicious, wholesome loaves right in your own kitchen. You’ll discover the satisfaction of transforming basic ingredients into a comforting staple, perfect for any meal and a delightful addition to your culinary repertoire.
These are the most popular Bread Book products
Keine Produkte gefunden.The Fundamental Ingredients of Bread Baking
At its core, baking bread relies on a few fundamental ingredients that, when combined correctly, create the structure, flavor, and texture you desire. Understanding the role of each component is crucial for success.
- Flour: This is the backbone of your bread. Different types of flour yield different results. All-purpose flour is versatile for most recipes, while bread flour, with its higher protein content, develops more gluten, leading to a chewier crust and interior. Whole wheat flour adds a nutty flavor and increased fiber, but can result in a denser loaf if not balanced with other flours.
- Water: Essential for activating yeast and gluten development. The temperature of the water is critical; lukewarm water (around 105-115°F or 40-46°C) is ideal for proofing yeast. Too hot, and you’ll kill the yeast; too cold, and it won’t activate properly.
- Yeast: The leavening agent that makes bread rise. Active dry yeast needs to be proofed in warm water before adding to the dough, while instant yeast can be mixed directly with dry ingredients. Fresh yeast is also an option but requires different handling.
- Salt: Not just for flavor, salt controls yeast activity, strengthens gluten, and contributes to the crust’s browning. Don’t omit it!
- Fat (Optional): Ingredients like butter, oil, or shortening add tenderness, richness, and improve shelf life. They coat the flour proteins, limiting excessive gluten development, which can make the bread softer.
- Sugar (Optional): A small amount of sugar can help feed the yeast, promote browning, and add a touch of sweetness.
Essential Equipment for Effortless Bread Making
While you can technically bake bread with very little, having a few key pieces of equipment can significantly simplify the process and improve your results.
- Mixing Bowls: You’ll need at least one large bowl for mixing and kneading, and possibly smaller ones for ingredients.
- Measuring Cups and Spoons: Accurate measurement is vital for consistent baking.
- Dough Scraper: A flexible plastic or metal scraper is invaluable for gathering sticky dough from your work surface and bowl.
- Bench Scraper: Similar to a dough scraper, but often sturdier and used for dividing dough.
- Baking Sheets or Loaf Pans: Depending on the type of bread you’re making.
- Cooling Rack: Allows air to circulate around the baked loaf, preventing a soggy bottom.
- Kitchen Scale (Recommended): For precise measurements, especially of flour.
The Bread-Making Process: Step-by-Step
Understanding the sequence of steps ensures your bread develops properly from start to finish.
- Mixing the Ingredients: Combine your dry ingredients in a large bowl. If using active dry yeast, proof it separately in warm water with a pinch of sugar. Then, add the wet ingredients to the dry and mix until a shaggy dough forms.
- Kneading: This is where gluten develops, giving your bread its structure. Turn the dough out onto a lightly floured surface and knead for 8-10 minutes until it’s smooth and elastic. You should be able to stretch a small piece thinly without it tearing (the windowpane test).
- First Rise (Bulk Fermentation): Place the kneaded dough in a lightly oiled bowl, cover it, and let it rise in a warm place until doubled in size. This typically takes 1-2 hours, depending on the room temperature and yeast activity.
- Punching Down and Shaping: Gently deflate the risen dough by punching it down. This redistributes the yeast and removes large air pockets. Then, shape your dough into your desired loaf form (round, oblong, etc.).
- Second Rise (Proofing): Place the shaped dough on your baking sheet or in your loaf pan, cover it, and let it rise again until nearly doubled in size. This proofing stage is crucial for a light and airy texture.
- Baking: Preheat your oven to the specified temperature. Score the top of the loaf with a sharp knife or razor if desired (this allows controlled expansion). Bake until the crust is golden brown and the internal temperature reaches 190-200°F (88-93°C).
- Cooling: Transfer the baked bread to a wire rack immediately. Cooling allows the internal structure to set and prevents steaming, which can lead to a gummy texture.
Simple Bread Recipes to Get You Started
Embarking on your bread-baking journey is best done with straightforward recipes that build confidence and yield delicious results.
Basic White Bread
This is a classic for a reason. Its simple ingredients and process make it an ideal starting point.
- 1 ½ cups warm water (105-115°F)
- 2 ¼ teaspoons active dry yeast
- 1 tablespoon sugar
- 3 ¾ cups all-purpose flour, plus more for dusting
- 1 ½ teaspoons salt
- 2 tablespoons unsalted butter, softened
Instructions: In a large bowl, combine warm water, yeast, and sugar. Let stand for 5-10 minutes until foamy. Stir in flour, salt, and softened butter. Mix until a shaggy dough forms. Turn onto a floured surface and knead for 8-10 minutes until smooth and elastic. Place in a greased bowl, cover, and let rise in a warm place until doubled, about 1-1.5 hours. Punch down, shape into a loaf, and place in a greased 9×5 inch loaf pan. Cover and let rise again until almost doubled, about 30-45 minutes. Bake at 375°F (190°C) for 30-35 minutes, or until golden brown and sounds hollow when tapped. Cool on a wire rack.
No-Knead Bread
This method is revolutionary for its simplicity and the incredible crust it produces, requiring minimal hands-on time.
- 3 cups all-purpose flour
- ¼ teaspoon instant yeast
- 1 ½ teaspoons salt
- 1 ½ cups cool water
Instructions: In a large bowl, whisk together flour, yeast, and salt. Add cool water and mix with a spoon until just combined; the dough will be shaggy and sticky. Cover the bowl tightly with plastic wrap and let it sit at room temperature for 12-18 hours. The dough will become bubbly and increase in volume. Generously flour a work surface and turn out the dough. Gently fold the dough over itself a few times to form a rough ball. Place the dough seam-side down on a piece of parchment paper, cover loosely with plastic wrap, and let it rest for 30 minutes. Meanwhile, place a Dutch oven (with its lid) in the oven and preheat to 450°F (230°C) for 30 minutes. Carefully remove the hot Dutch oven from the oven. Lift the dough using the parchment paper and carefully place it into the hot Dutch oven. Cover with the lid and bake for 30 minutes. Remove the lid and bake for another 15-20 minutes, or until the crust is deep golden brown. Let cool completely before slicing.
Quick Whole Wheat Bread
For a healthier option that’s still fast, this whole wheat bread is a winner.
- 1 ½ cups warm water
- 1 tablespoon sugar
- 2 ¼ teaspoons active dry yeast
- 1 cup whole wheat flour
- 2 cups all-purpose flour, plus more for dusting
- 1 teaspoon salt
- 2 tablespoons olive oil
Instructions: In a large bowl, combine warm water, sugar, and yeast. Let stand for 5-10 minutes until foamy. Add whole wheat flour, 1 cup of all-purpose flour, salt, and olive oil. Mix until combined. Gradually add the remaining all-purpose flour until a soft dough forms. Turn onto a lightly floured surface and knead for 5-7 minutes until smooth. Place in a greased bowl, cover, and let rise in a warm place until doubled, about 45-60 minutes. Punch down, shape into a loaf, and place in a greased 9×5 inch loaf pan. Cover and let rise until almost doubled, about 25-30 minutes. Bake at 375°F (190°C) for 30-35 minutes, or until golden brown and sounds hollow when tapped. Cool on a wire rack.
Mastering Techniques for Better Bread
Beyond the recipe, certain techniques can elevate your bread from good to exceptional.
- Hydration Levels: The ratio of water to flour significantly impacts the dough’s texture. Wetter doughs can be trickier to handle but often result in a more open crumb and chewier crust.
- Oven Spring: This is the rapid expansion of dough in the oven during the initial baking phase. A good oven spring leads to a lighter loaf with a well-developed crust. Ensuring your oven is fully preheated and using steam (by placing a pan of water in the oven) can dramatically improve oven spring.
- Scoring: Making cuts on the surface of the dough before baking allows steam to escape in a controlled manner, preventing blowouts and creating attractive patterns.
- Fermentation Time: Longer fermentation times, especially in cold environments (like a refrigerator), can develop more complex flavors in your bread.
Troubleshooting Common Bread-Baking Issues
Even experienced bakers encounter challenges. Knowing how to address them will save your loaves and your sanity.
- Dense Loaf: This can be caused by under-kneading, not enough rising time, dead yeast, or using too much flour.
- Crumbly Texture: Insufficient kneading or too little liquid can lead to a crumbly texture.
- Pale Crust: Your oven might not be hot enough, or you may need to bake for a longer duration. Adding a little sugar to the dough can also help with browning.
- Gummy Interior: This usually indicates the bread was not baked long enough or was cut before it cooled completely.
- Bread Won’t Rise: Check your yeast’s expiry date and ensure the water temperature was correct for activation. Drafty environments can also hinder rising.
Beyond the Basics: Exploring Bread Varieties
Once you’re comfortable with simple recipes, the world of bread baking opens up to endless possibilities.
- Sourdough: Utilizes a starter culture of wild yeast and bacteria for a tangy flavor and chewy texture.
- Rye Bread: Incorporates rye flour, which has less gluten than wheat flour, often resulting in a denser, darker loaf with a distinctive flavor.
- Enriched Doughs: Recipes that include ingredients like eggs, milk, butter, or sugar, such as brioche or challah, yielding softer, richer breads.
- Flatbreads: Quick breads baked on a griddle or in a hot oven, like pita or naan.
- Artisan Breads: Often characterized by rustic shapes, hearty crusts, and open crumb structures, achieved through long fermentation and careful shaping.
Understanding Flour Types and Their Impact
The choice of flour is paramount to the success and character of your bread.
| Flour Type | Protein Content | Typical Use in Bread | Resulting Texture |
|---|---|---|---|
| All-Purpose Flour | 10-12% | Everyday breads, rolls, quick breads | Moderately chewy and tender |
| Bread Flour | 12-14% | Crusty loaves, artisan breads, bagels | Chewy, elastic, good rise |
| Whole Wheat Flour | 13-14% | Adds flavor and fiber to most breads | Denser, heartier, nutty flavor |
| Rye Flour | 8-12% | Rye breads, often mixed with wheat flour | Denser, sometimes sticky, unique flavor |
| Gluten-Free Flour Blends | Varies (contains starches and alternative flours) | Breads for gluten-intolerant individuals | Can vary widely, often denser than wheat breads |
The Science Behind Yeast Activation and Fermentation
Yeast, a single-celled microorganism, is the engine behind leavened bread. When provided with warmth, moisture, and food (sugars), it undergoes fermentation, producing carbon dioxide gas and alcohol. The carbon dioxide gets trapped within the gluten network of the dough, causing it to rise.
- Optimal Temperature: Yeast is most active between 75-100°F (24-38°C). Temperatures above 140°F (60°C) will kill it.
- Proofing: Dissolving active dry yeast in warm liquid (around 105-115°F or 40-46°C) with a bit of sugar helps ensure it’s alive and active before you add it to your main dough. This is often indicated by a foamy, bubbly surface.
- Fermentation Stages: The first rise (bulk fermentation) develops the dough’s structure and flavor. The second rise (proofing) allows the dough to achieve its final volume before baking.
- Factors Affecting Rise Time: Room temperature, the amount of yeast used, and the presence of ingredients like salt and sugar all influence how quickly dough rises.
Tips for Achieving a Perfect Crust
The crust is often the most anticipated part of a homemade loaf, providing a satisfying crunch and deep flavor.
- Preheat Thoroughly: A hot oven is crucial for an immediate burst of heat that initiates good oven spring and crust development.
- Steam is Your Friend: Introducing steam into the oven during the first 15-20 minutes of baking keeps the crust pliable, allowing for maximum expansion. You can achieve this by placing a pan of hot water on the bottom rack of your oven or by using a Dutch oven.
- Bake at the Right Temperature: Follow your recipe’s temperature guidelines. Too low a temperature won’t create a crisp crust.
- Don’t Cover Too Early: Once the bread has achieved its desired rise, remove any covers or steam sources to allow the crust to brown and crisp up.
- Cooling on a Rack: Essential for air circulation, preventing the bottom crust from becoming soggy.
Incorporating Herbs, Spices, and Other Add-ins
Elevate your bread by infusing it with additional flavors and textures.
- Herbs and Spices: Fresh or dried herbs like rosemary, thyme, or oregano, or spices such as caraway seeds, anise, or cinnamon can be kneaded into the dough or sprinkled on top.
- Seeds and Nuts: Sunflower seeds, poppy seeds, sesame seeds, walnuts, or pecans add texture and flavor. Toasting them beforehand enhances their taste.
- Dried Fruits: Raisins, cranberries, or chopped apricots can provide sweetness and chewiness.
- Cheese: Grated cheese like cheddar, Parmesan, or Gruyère can be incorporated for a savory bread.
- Vegetables: Finely chopped onions, garlic, or sun-dried tomatoes can add depth. Ensure they are not too moist, as this can affect dough consistency.
These are the latest Bread Book products with the best ratings.
Keine Produkte gefunden.These are the latest Bread Book products with the best ratings.
Keine Produkte gefunden.FAQ – Frequently Asked Questions about Bread Recipes: Einfach selbst backen
What is the most crucial step in bread making for beginners?
For beginners, understanding and correctly executing the kneading process is paramount. Proper kneading develops the gluten structure that gives bread its characteristic chewiness and allows it to rise effectively. If kneading is insufficient, your bread will likely be dense and heavy.
How do I know when my bread is fully baked?
The most reliable indicators are the internal temperature and the sound the loaf makes. A fully baked loaf will register an internal temperature of 190-200°F (88-93°C) when tested with an instant-read thermometer. Additionally, when you tap the bottom of the loaf, it should sound hollow.
Can I use bread made with active dry yeast the same day I mix it?
Yes, you can bake bread made with active dry yeast the same day. The typical process involves mixing, kneading, a first rise, shaping, a second rise (proofing), and then baking, all within a few hours. Recipes like “Quick Whole Wheat Bread” are designed for same-day enjoyment.
Why does my bread have a tough crust?
A tough crust can result from baking at too high a temperature for too long, or from not introducing enough steam during the initial baking phase. Steam helps keep the crust pliable, allowing the bread to expand fully before it hardens.
What is the difference between active dry yeast and instant yeast?
Active dry yeast needs to be “proofed” in warm liquid before being added to other ingredients, as it needs time to become active. Instant yeast, on the other hand, can be mixed directly with dry ingredients as its granules are smaller and more reactive. For most simple recipes, either can be used, but follow the specific instructions of your recipe.
My bread is consistently dense. What could be the problem?
Several factors can lead to a dense loaf. Common culprits include using dead yeast, not allowing enough rising time for both the first and second proofing stages, over-flouring the dough, or insufficient kneading. Re-evaluate your yeast freshness and the timing of your rises.
Is it better to knead bread by hand or with a stand mixer?
Both methods can yield excellent results. Hand-kneading allows you to feel the dough’s development and build a connection with the process, which many bakers enjoy. A stand mixer with a dough hook can be more efficient and less labor-intensive, especially for larger batches or stiffer doughs. The key is to achieve the correct gluten development, regardless of the method used.


